This is for you Wendy Y-H. Hope you take a peek!
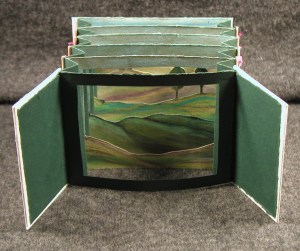
For this seasons 4E house project I’ve decided to create a tunnel book. Each artist has to respond to the previous artist’s page, there is no real subject (well, not at this point because I’m still creating the back ground). Tunnel books are assembled with a solid back and accordion pleated sides. Each interior page is cut away. This is a basic tutorial for the creation and will accompany the project.
Accordion pleats
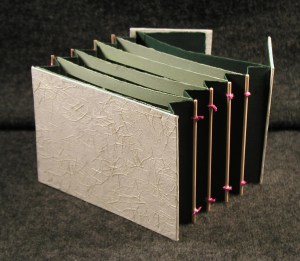
To start with , I picked a dark green 80lb cover stock for the accordion pleated sides. One sheet (8.5″x11″) folded long-ways and divided (4.25″x11″) was enough for this small book. I then folded one section in half (5.5″x4.25″) and marked it every .75 inches. A straight edge and bone folder were used to create the folds. After the folds were creased, I marked basic points to punch small holes for attaching the pages. One could certainly just use glue to attach the pages and in hindsight, its a much easier process.

Pages:
Created from a quartered section of 80lb cover paper(8.5″x11″), I made the book 6 pages deep including the back and front window.
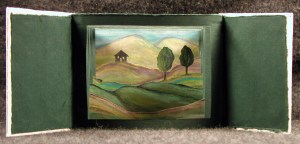
I had a simple image in my mind incorporating hills, trees and a house. I started from the back and worked forward in design, so tallest mountains reside on back page, hill with house on next, lower hills w/ trees, lower and lower hills towards the front and the final frame.

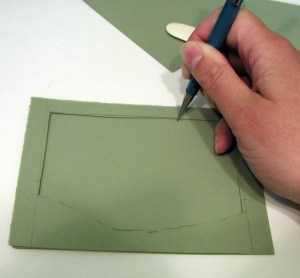
I used an exacto blade to remove the negative space on each page.
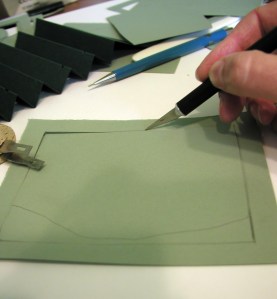

Once all the pages were cut to my liking, I sanded them w/ 220 grit to create a surface for the pastels to adhere. One could also just spray fixative to help adhesion. This was only the 4th time ever using chalk pastels. After multiple layering of pastels and fixative it could move on to the next step. Attaching pages to the accordion sides.

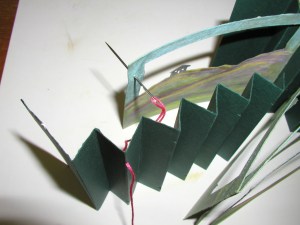
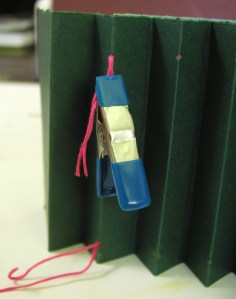

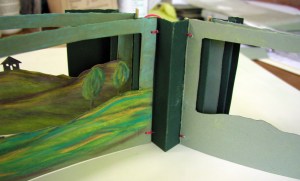
This was more time consuming than I originally thought. I decided to stitch the pages into place using embroidery floss and hot pink was the only color to be found. The floss was then tied around bamboo skewer sticks. The bamboo did have the problem of slipping out so a small amount of PVA glue was applied at each knot.

Holy Cow Gale!
What a cool idea, creation. Even better in person to see. Thank you for doing a tut.
love, your big sis, Kim
Beautiful tutorial and the final book is gorgeous. Congratulations….I like your blog.
Hi Lorraine!
Thanks for your comment. It’s always nice to hear from other artists. Your work is amazing! Wish I could take your mini workshop!
I like the idea of making the front open like double doors! Every time I have made one of these I didn’t have a front, just because I was more focused on the image inside.
The double doors just seemed like a good thing. Can’t remember if Ann had one on a piece or where the concept came from. It works and one of these days I’ll post images of a collaborative tunnel book by 7 friends. A binding is included to protect the whole thing.
Thanks for your comment!
Gale
WHOA, WHOA, WHOA!! HOW stinkin’ COOL!!
🙂
It’s been a very popular post, especially in Russia. An amazing response for the very first accordion book I’ve ever attempted, even prior to taking any book making classes. Ah, the things I’ve learned since then! 🙂
Oooh I like this Gale. Though they do look more time consuming than glue, I like the possibilities that the skewers (or other support) give you to incorporate another layer of meaning….hmmm
Wow, thanks Elaine! It’s been sooo long since doing this project that I almost forgot about using the skewers. I did notice there will be a nice Tunnel Book course offered at Sitka this year (2012). A very fun process!
Hi there! I know this is sort of off-topic however I had to ask.
Does running a well-established blog like yours take a lot of work?
I am completely new to blogging but I do write in my diary everyday.
I’d like to start a blog so I will be able to share my experience and feelings online.
Please let me know if you have any kind of recommendations or tips
for new aspiring blog owners. Thankyou!
Hi Latisha! Thanks for your question.
With 7 billion people on this planet, we all have a story to tell and each story is unique. Sticks Stones n Paperstew was created late February 2009, but it wasn’t my first blog. The first was created in 2004 after graduation and wasn’t long lived. When I started Sticks Stones n Paperstew, I was at a different place in life and it clicked. My blog is about me as an artist trying to discover where I fit in the art world. It is also about my family: traveling through the unknown world of cancer, loss of both parents, and coming out the other side as a stronger individual (I hope!). Personally, I’m not out there trying to gather thousands of followers. I want to create small friendships world wide. I’ve even traveled 500+ miles to meet up with one of my blog friends, helping cement our relationship even more. It’s a small world out there. 🙂
Does it take a lot of work? That’s up to you and how comfortable you are with writing/photo sharing. During larger art projects, it becomes a life routine, like making tea before opening up the computer in the morning. I use it to keep track of progress made. When I’m not creating large works, it still acts as a means of accountability: What was I creating last year at this time? How did I start that process? Blah, blah, blah…
Write about what you’re interested in. Write when you feel comfortable. Listen to your inner voice and stay true to it. Have fun and embrace the world! Just do it and see where it leads.
Thanks!
Gale
Hi ! It’s a wonderful piece of art ! Using pastels for this kind of craft never came to my mind, though I’m used to draw art pictures with them. I might try someday to do a book of the type. But I will make it otherwise. I already have ideas on how to procede 😊 ! I already tried a tunnel card, which was a bit similar to your book, refering to the images, except that it was a wood instead of a landscape. And there was no accordion. It would only fold flat as any card do. Your idea is one that I will keep in mind 😊. I’am already thinking of an underwaterscape 😉 ! Thanks for sharing 🙏 ! Kisses from France 🇫🇷
Thank you Olga for your cheery note 😊
I’m so glad you are enjoying creating books. My book wasn’t quite how traditional makers join pages, but it was an experiment. It now lives with my sister in law.
Happy bookmaking to you!