After going crazy over the project for the past few days, my brain and body are tired. I spent an hour with the physical therapist today, working on freeing up the QLs on the left side and the sciatic nerve issues (probably the main culprit of all my foot woes). So no cutting today. Possibly a bit of drawing while catching up on Game of Thrones. I feel like trying to figure out how best to portray filberts (aka hazelnuts). Maybe some gentle sanding on the wood before painting.
Tuesday was a full day of work, from cropping the image, enlarging, mounting to 2 thin sheets of plywood, drilling, and many hours of cutting. Last night Dave and I talked quite a bit about how to make the image stronger from a distance. That’s been my biggest concern with taking hand-cut paper into a much larger size. Will it read well? By simplifying the design and keeping the bee as part of the focus, I think I’m finally moving in the right direction.
I’m exhausted and don’t have the energy to sit at the computer. My back hurts and needs to get vertical and out on a dog walk. Dinner would be nice too.
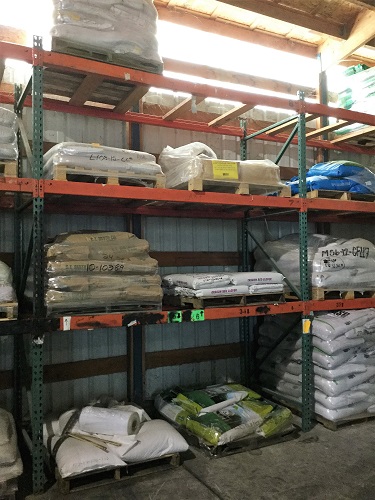
More tweaking to come tomorrow. Oh, and 1/3 of the sign materials arrived today. Only 8 more packs to go!
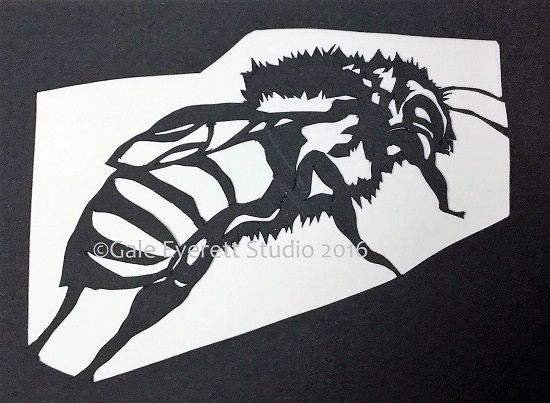
How can it be Solstice already? Time is just zooming by so quickly. Today I worked on two squares: continuation of the radish with bee and the Cross Bros grainery. The honey bee has taken up most of my day. I worked from photos taken over the past year of bees in flowers and resting on our back deck. The below cut is pretty small, 3″ x 4″. I needed to work it out at this size to be able to achieve something smaller. The wings still need some work, but maybe in a larger format. It’s amazing how fuzzy bees are! Even the little honeybees are covered in small hairs. Quite a challenge for cutting!
Next Saturday I’ve been asked to fill in as an exhibiting artist during the Cozy Rose Garden Sale. I was an alternate in 2015, filling in for someone else who couldn’t attend. Last year the weather was horrible, reaching into the mid to upper 90’s with higher than average humidity. I’m probably nuts for even contemplating doing this show since I don’t have much inventory, but who knows, maybe I’ll actually sell a lamp this year! Ha! Right now the Rural Arts project takes precedence. I’ve set up a schedule of creating 4 designs per week to make the July 7th deadline. That’s well over and above what I’ve currently been doing, which has been squat. Ok, I have been playing with wool, so it’s not totally been squat. The sunshine is beautiful today and I’m working in the cold studio. Tonight we’ll get out for a good dog walk and soak in the longest day of the year.
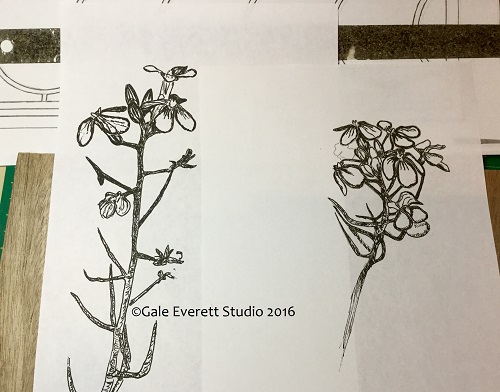
So, how does one approach an idea for a wall installation? Well, I decided to start with cut paper, since that’s what got me this gig. Currently, I’m attempting to portray one of the multiple bee/honey crops out in the Halsey area. Clover, Radish, and Meadow Foam are all crops around the area for honey production. In the above radish design, I’ve actually swapped the original direction. More altering of height in the second stem of flowers will happen and an addition of one or two bees. It amazed me to see it come together in cut paper. Yes, I think this project really will work!
For those wondering, this is the starting point of a public art project through the Arts Center of Corvallis and their Art in Rural Communities project. This year, 2016, is in Halsey Oregon, and my second project for this city. I’m super excited at this opportunity of outdoor public art!
Sketching started today with a look at radish blooms and seed pods. The flowers are mainly white with some pink. I think, with some serious cutting I can give a good look to these plants. Hopefully. There is a lot of nice negative space created as stems and pods overlap. Somehow I need to interject a honey bee or two, plus bee boxes in the background, possibly clouds, Coast range, ideas keep coming forward.
I think the actual design start of a project can be unnerving. Pulling concepts from my brain to paper isn’t the easiest. In my thoughts, the wall project looks easy to accomplish, but will the actual project look anything like I envision? I realize no one else can actually fully comprehend what’s residing in my thoughts, so it doesn’t matter. Right?? Plus this journey is just starting and there’s loads to accomplish in such a short time. Must be time to take a break and look at things again tomorrow.
The week is quickly coming to a close and several items have been accomplished!
Contract signed and turned in.
2. Scroll saw and base delivered, set up, and tested.
3. Sign materials ordered!
4. Field research started.
5. Garage space cleared for action! Ok, plus a ping pong table delivered last Sunday (and still has yet to be used).
The week started with the delivery of a heavy yellow box. Inside the yellow box was a yellow piece of equipment! I actually held off opening the box until the giant mess in the garage was addressed.
Delivery!
New Scroll Saw without the work surface in place.
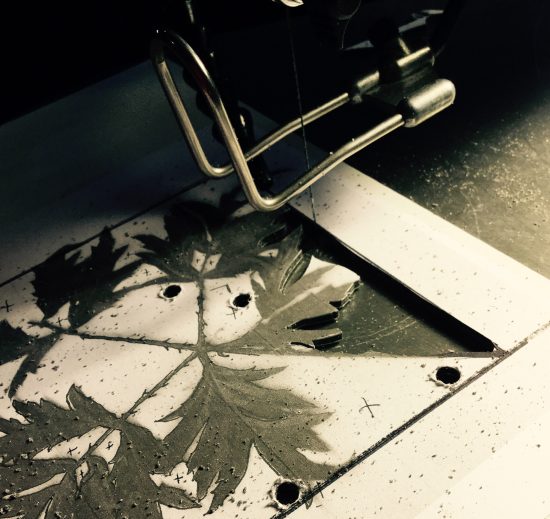
Scroll saw practice has begun and it works beautifully. The machine is super quiet, an added bonus. Since this is a new piece of equipment, I’ll be in a steep learning curve. I’m watching loads of “Scroll saw 101” courses on YouTube. Best blades to consider, how to cut good corners, cutting multiples, and other good bits of information. I miss not being able to ask my dad for help. He would have enjoyed this project. Below is my test image mounted to the sign material using spray mount glue.
Pilot holes drilledCutting out blackberry leaves.
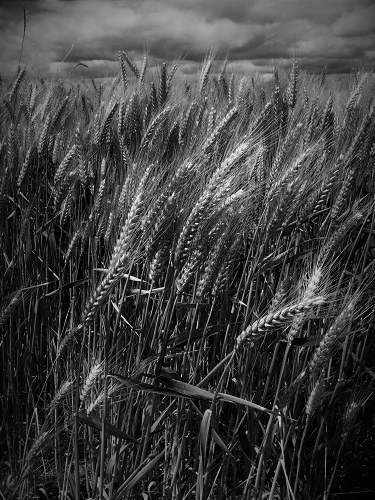
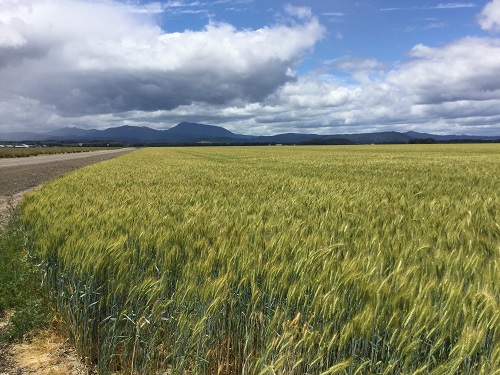
Field research this week was sparse. The local farmers are growing numerous radish seed crops this season, plus stocking loads of beehives. The below field is about 3 miles from my home. Halsey has several radish fields with beehives close to town. One has a beautiful view of Mary’s Peak in the background and will probably make up one square.
Research for sign material has been more challenging. Finding the specific names of materials (in a field unknown to me) has been interesting. I’m thankful to my friend Carol for all the tips (and sample materials) she’s provided. I decided on a thinner product that should hold up to the task, and about $13 less expensive per 2ft x 4ft sheet (saving about $156). Normally, full sheets are 1/8″ x 48f” x 96″, an unmanageable size for me individually. After numerous online searches, I found 24″ x 48″. Bingo! I’ve ordered enough for the project…. I hope!
More research to come and hopefully drawings to start this weekend!
And for those who don’t know what this project is about: I was juried into Art in Rural Communities project through The Arts Center of Corvallis. This year the project is in Halsey Oregon and will be an outdoor piece mounted to a wall. I’ll be posting images of my process from start to finish in September 2016.
I didn’t sleep much last night because I couldn’t turn off my brain. Things are certainly shifting and moving with design ideas for the wall project. Friday I took a trip to Eugene and went off 99W for a couple of photos. The skies were filled with dynamic clouds, rain showers in the distance, and very strong lighting. It was just after noon. I realized the next time I go out would need to be late afternoon for high contrast in the fields. Wheat will definitely be part of one design square. In the past, Halsey was one of the largest shippers of wheat in the valley. It remains a strong crop for the area.
During the Coffee & Donut talk on Wednesday, I mentioned thinking of my work as being similar to quilts: using square/grid format as a base. This morning work started on an overall design idea. Following in my sisters quilting footsteps, I pulled out grid paper and started work. The initial thought was to use 3ft x 3ft squares, 2ft x 8ft rectangles for vertical separation, with 2ft space between everything.
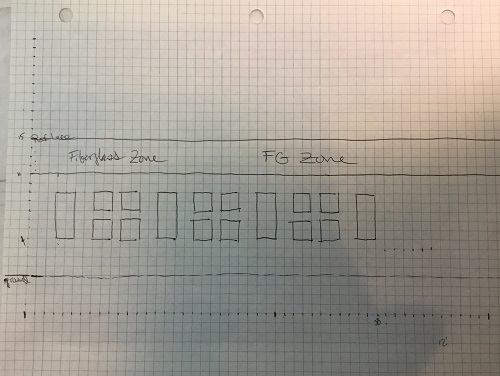
After this sketch, I realized I only have 11ft height to work with (or do I? Accurate measuring to come). Using 8ft, I would only have a buffer on the bottom of 3ft. Not so good! Plus this design would require 4 sheets of 4’x8′ material. Dropping down a bit in size gives me the below image (1.2)
Design 1.2 drops dimensions a bit. Squares at 2ft and verticals at 2ft x 5ft. On second thought, I’ll probably drop that to 1.5ft width for the rectangles. With it covering only 5ft in height I’ll be able to give a generous 5ft lower buffer for the work. Below is a general idea of how much space it would occupy.
This is just the first concept and it allows my brain to think about height and overall space. Sunday will be another road trip to double check dimensions and take out paper squares/rectangles to tape on the wall. I’m probably dreaming way too big, but why not! I see this project as a great brain challenge.
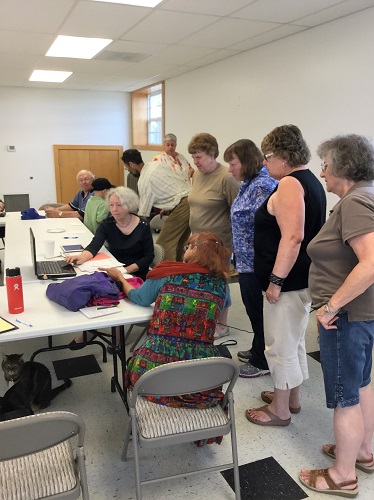
Wednesday morning I traveled south to Halsey City Hall for a meeting with the Coffee and Donuts group. That morning the group was there to put forth ideas of “what makes Halsey unique, what is the town known for and how can two artists capture these ideas into 3D wall sculptures.” There are now two of us creating work, myself and Portland artist Bonnie Meltzer. We will both hang on a warehouse exterior wall owned by DLF International Seed. After the first meeting, Hester and I went to talk with the VP of Operations at DLF. What an accommodating office! It will be a pleasure to work with this company. Halsey is the USA base for DLF, while corporate headquarters are located in Denmark (or something along those lines). Halsey is the largest seed producer in the world! Along with seed production, other forms of agriculture are quite abundant around town. The logging industry plus paper/wood pulp mill round out the economic base.
The wall looks like this:
I also took an interior shot to note the spacing and board width for attachment.
The overall length of the building is about 100 ft. Full wall height is 15 ft. I’ll not go past 11 ft since the upper section is fiberglass that allows light into the warehouse. The exterior is corrugated aluminum and is riveted ever 1.5 ft from the ground level up. This is all important information for designing and mounting the work in mid-September. Yes, only 3 months to design, fabricate, paint, and mount! What a challenge!
Today, I ordered a good scroll saw plus stand to make fabrication easy. That should arrive next week. It’s one of those tools I’ve always wanted to purchase but never had a good enough excuse. Now is that time! I also spent time cleaning up space in the office for actual design work. It’s amazing how cluttered the drafting table becomes. A flat surface never stays uncovered for long! Next step will be to figure out silhouette size and how many will be created for my section and ultimately how much material to purchase.
So that’s the start of the wall project. Keep watching for updates of progress as we move through the months until deadline. This will be a very full summer of art!
Art in Rural Communities is a program through The Arts Center of Corvallis, OR.
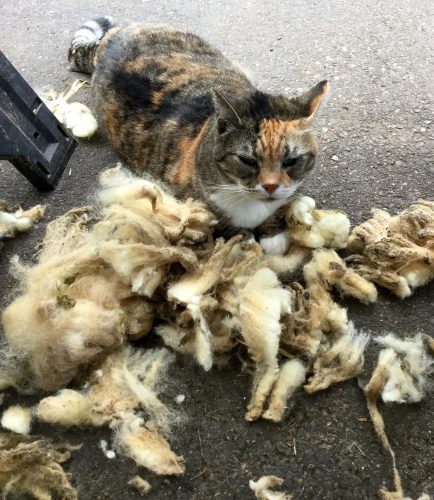
Pulling out the fleece.The weather is warming up which means its time to start cleaning wool. The past few weeks have been grey and rainy, not very appealing for starting the first experiment. A few weeks back, I created a basic rack for drying the washed fleece using hardware cloth and lumber from the stash. The new creation was put to use even before washing. It’s a handy surface for spreading the fleece out and removing the undesirable poop clods and manky bits. The garage sink has become the wash station due to a convenient location and height. The wash tub is slow filling, but drains quickly. Cleaning fleece is a totally new experience for me. I’ve spent countless hours watching YouTube videos (where would we be without the internet!) and reading numerous sites. I’ve decided to clean the fleece first before carding and spinning. Since it can be quite easy to felt using hot water and agitation, I’ve been very careful to gently soak the wool for about an hour in hot water and detergent. The water temperature only reaches 116F and one site wants it to be 140-160F. No agitation! I press the clumps down into the bath and let it be, drain off, remove the fleece, refill the tub for a rinse and drop the wet load back into the bath. Repeat the cycle again (and again) until the water runs clear.
First wash on part of a fleece.Eventually the wool starts to look cleaner as seen in the photo below. One thing I’ve determined, it’s better to spend more time picking/cutting/pulling out the bad bits before washing. Talk about a labor intensive process! I already have so much more appreciation for those that process their own fleece from start to finish!
Raw fleece (left) vs washed (right)One thing I didn’t realize was how much the cat would like rolling around in the plucked out parts. She now smells like a sheep.
MeMe loving the stinky wool. After more washingThe fleece clumps are drying in about a weeks time. The upcoming weekend temps should speed up the process even faster! Mid to upper 90’s predicted! I’ll be making a trip to Eugene in a few days for banking, clay purchasing and a stop at the Textile Center for carding paddles.
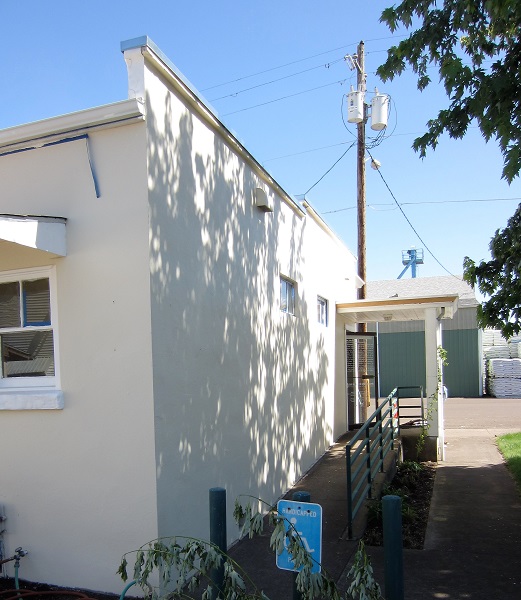
This evening I received a brief email stating that I was IT! I have been chosen to create public wall art for the city of Halsey!! No more being inside buildings, I’m moving out into the world of rain, wind, and sunshine. Plus it will be even more visible to the public! I really enjoyed working with the people of Halsey back in 2014. That was when I created a sculptural work inside the little building above. The new work will be mounted to the wall across the street, possibly the green building beyond? Or is it across the other street? Clarification will come in a few days, along with the full outline for project due dates and moolah. Are they putting all the eggs in one basket or spreading it out between multiple artists? I still don’t know yet.
At least I’ll be working with manageable sizes of light weight sign material (aluminum/plastic combo) and a scroll saw to prevent serious tendon/muscle damage to my hands. Hopefully the spine can get it’s act together and be happy sooner than later.
Just a tad happy and proud to have been chosen. Now the hard work will begin, but that’s ok. I love having serious challenges placed on my brain. It makes me feel more alive!