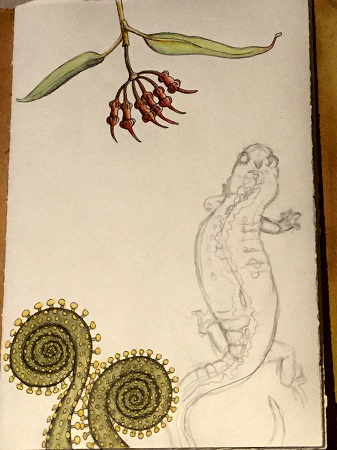
Slowly the front page of Karen’s book is coming together. It’s been another crazy couple of days and I’m just sitting down for a little sketch time. So far I’ve laid out the salamander body. Why a salamander? I have no idea, but it just seemed like a fun forest critter to add. It did become rather large, but I can’t go backwards now. This is a long toed variety. They have a lovely green pattern that runs from between the eyes to the tip of the tail. The body color is dark, shiny, with flecks of the same spotting on it’s sides. I really love the patterns down their back. It also surprises me at how their body gets creases and folds as they walk. These little guys live underground throughout our valley and into the mountains.
I should make my way through this image today. Tomorrow I’ll finish off the other joint page. The studio is so enviting these days since the temperature is about 15-20 degrees cooler than outside. Yes, the heatwave continues….
Saturday was humid and hot. Driving over, I actually encountered a pretty good rain shower, then had a touch more right at opening. With the spotting of rain, the humidity pushed way up and probably kept us from getting to 100 F. Instead we made it into the mid 90’s. The garden was spectacular and crammed with so much diversity of color, texture and patterns. It would have been nice to sit around and work on small sketches, but I chose to hang out by my work and talk with visitors. The kiln opening was like Christmas. So many wonderful things to see, but it was a tad warm in the space! It seemed like Rhoda sold quite a few items fresh from the kiln.
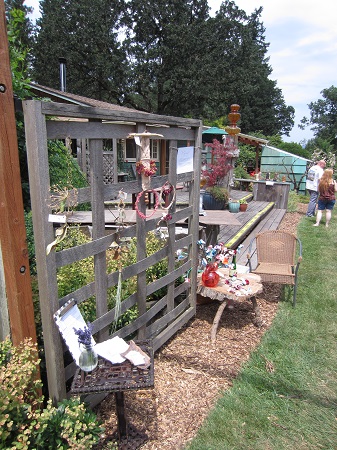
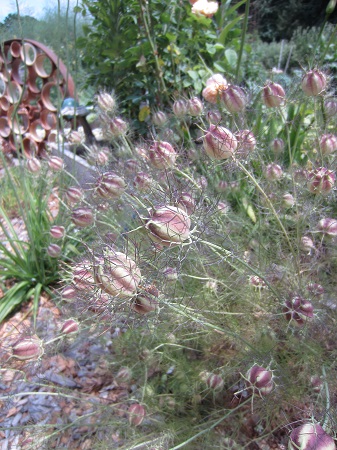
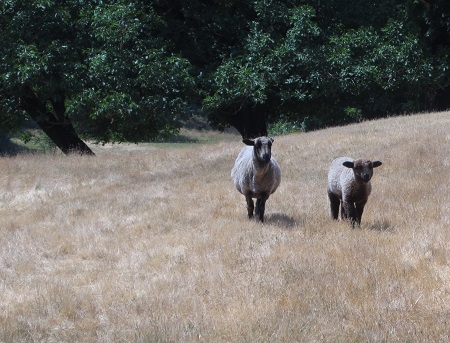
Here are a small group of photos I snapped while walking around the garden. For some silly reason I didn’t get pix of everyone there! I have to blame the heat. We had around 100 visitors who braved the weather. I did sell two small works. Not too shabby for the inaugural year! Next year will be even better!
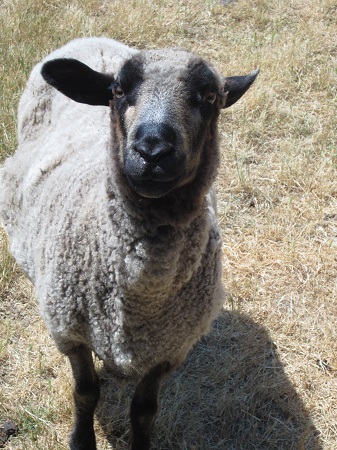
Second Camas in the garden.Garden entrance.Sales and Info, plus my collection of lamps and prints to the far left in front of the garage.Seedpods with sculpture in the backgroundMum and baby coming for a visit. Romney Marsh breed.Got any food?Totem by the front entrance.
I certainly received loads of praise for the Camas sculptures. Maybe I’ll experiment with one in my garden to see how it holds up to the remaining summer. By fall, I should have a pretty good idea how it fairs with the weathering.
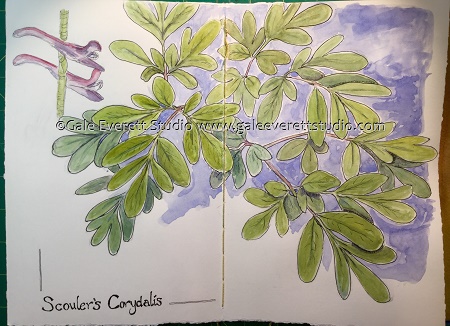
Have you ever created something and then thought “Who made that? It doesn’t look like me!” But then what is me? And how does ME come forward without experimenting with different ideas? Last night I pondered this “me” moment after working on the above page. Creating something for another person always puts a self-imposed level of expectation on the work. There is that nagging feeling that it’s not good enough, but I have to push past that and accept where it is. The image is a watercolor and pen rendition of a native wildflower, Scouler’s Corydalis. It’s not scientifically accurate but a more generalized interpretation of the foliage and a couple of flowers. I added a blue wash behind the leaves that helped ground the image more. Plus I liked it! I only use pen and watercolor on rare occasions, typically in travel sketchbooks, but I’m starting to use it for more general things. Everything still feels like a giant experiment, and that’s probably ok for now.
Last night my husband was trying to explain the artist book collaboration to his mother via phone. She brought up some interesting questions that I can answer here: The work produced is simply for each other and isn’t going to be sold. The books are individual artworks. There isn’t any way to reproduce each individual book since they are unique. It’s just for fun. No monetary gain what so ever! While he was talking to her, I handed him the book open to the page. He spent time looking through it after the phone conversation and he wondered who had created what. That made me chuckle because he couldn’t even recognize the above page as being my creation. Guess it’s nice to keep him surprised! If it were a dog sketch or something in charcoal, he could have figured it out.
I’ll be spending the next couple of days (weeks) trying to avoid the heatwave that’s setting in. Possibly 100 F (38 C) tomorrow and Saturday. Urgh, Saturday will be the big garden art sale! Heat! Dehydration! Melting Camas sculptures! It will be what it will be! Hopefully some brave souls will come visit.
Slowly the full page for Karen’s book is coming together. Back in May when we spent some time on Cape Perpetua, I took a few photos of plants I didn’t know. One turned out to be Corydalis scouleri, or Scouler’s Corydalis. I was drawn to it’s beautiful elongated leaves and elegant spikes of flowers. It seemed like a good fit for the book collaboration. Karen’s theme is Patterns in Nature:Forest. More work to come to finish off the page a bit more but at least color has finally graced the page!
Watercolor, Sakura Micron pen, graphite.
Plant info: Height- 60-120 cm tall,
Flower stalks: 20-30 cm tall, pink, spurred, spike like clusters.
Pacific Northwest coast range, moist forests and riparian zones.
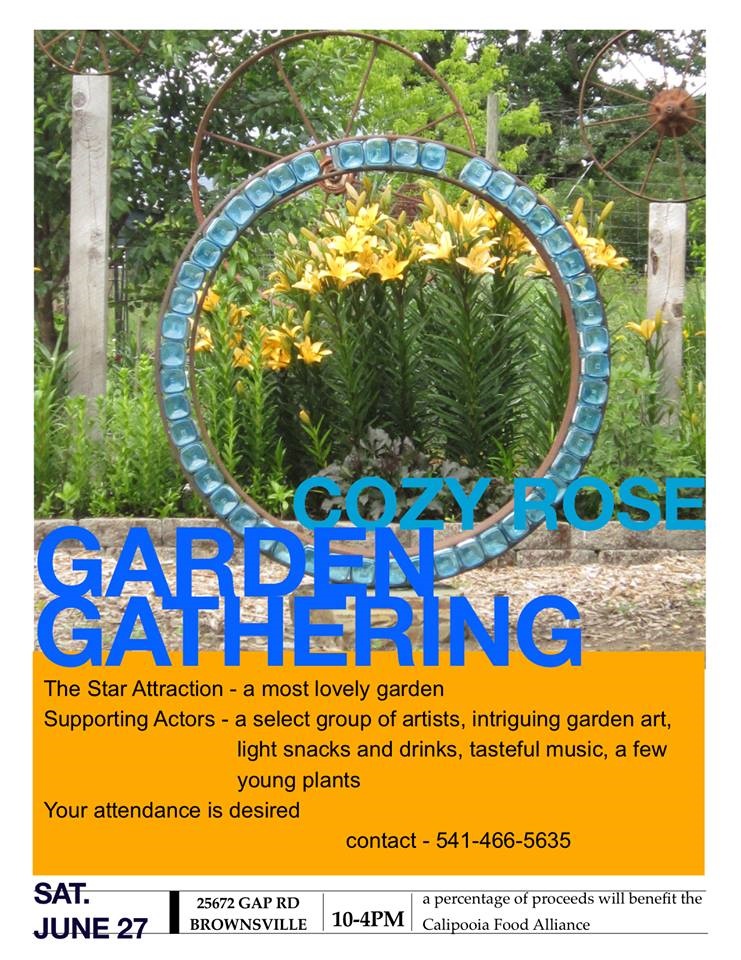
I’ve been trying to plan my next escape to the coast, hoping for a full week of solitude for drawing and designing. Which week do I choose and do I take the dog? Well, now it’s been pushed off until late July due to everyone wanting to use the house over the next multiple weeks. Plus my next 8 days has totally shifted towards one goal: a garden art sale on June 27th. Last night I received a message from a friend, Rhoda Fleischman (amazing ceramic artist, painter and sculptor), inviting me to fill a vacant spot in her garden event. There will be 12 artists participating, plus food, music and the big kiln opening at noon! Not only is it pairing art with a beautiful garden, but it’s a benefit for one of the local food groups. A percentage of all art and food sales will be donated to the Calapooia Food Alliance! Art AND a good cause!
What to take? That’s always the big question! Since this happens to be taking place in a beautiful garden, I’ll be bringing as much botanical work as possible. Today I’m hand coloring camas prints created several years back. It’s been one of those jobs waiting on the back burner and this is the perfect opportunity to get them out of the studio. I’ve also pulled out hand colored Shooting Star prints (a native plant) plus hand cut paper botanical silhouettes. Dog prints, lamps, and the camas sculptures will join in the fun too. I’m not certain about my newer waxed work. Frames need to be created and I have a very limited amount of time. Those might just wait for the Philomath Open Studio tour in October, but it would be loads of fun to have some of the birds on display! We will see how creative I can get over the next 8 days!
The location is : 25672 Gap Rd, Brownsville OR
Open from 10-4pm Saturday June 27th!
Kiln opening at noon – Music at 2pm – Should be a lovely time for all!
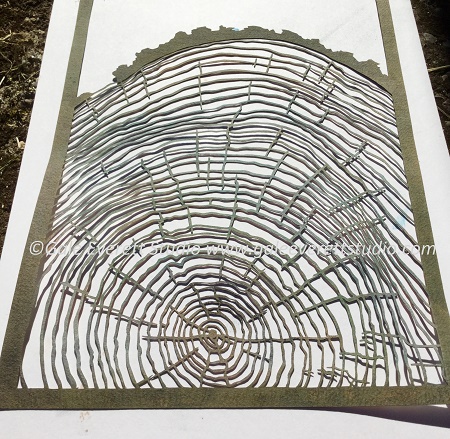
This is the only teaser I’ll be posting of the finished “Tree Rings- One Year After Cutting”. The above work has been waxed and then lighted from behind. It’s next step will involve framing and back-lighting. Overall, I’m pretty happy with how this has turned out. There are a few glitchy things that I’m not certain I’ll be able to fix to my liking. Let’s just say “tension wrinkles happen”. I now have a better idea of how to avoid them (hopefully) with the next cutting project. The final reveal will occur once the piece is framed and complete. That might happen in a couple of weeks so don’t be holding your breath! Framing is my least favorite thing to do since it makes me step outside my comfort zone.
This one of several pieces I’ll enter into a jury selection for a specific show titled Rot: The afterlife of trees at The Arts Center of Corvallis Oregon.
It’s a lovely change to move through a project and actually enjoy the end work. That doesn’t always happen in my brain. It sees all the nicks, imperfections, badly orchestrated portions, and almost never the good parts.Shake n bake my brain in a coating of depression and things really don’t progress well. Eventually, after loads of time, I can sit back and think “hmm, that actually looks pretty good!”. It’s just amazing that there isn’t the wait with this project. I’m actually pleased with how it’s all coming together.
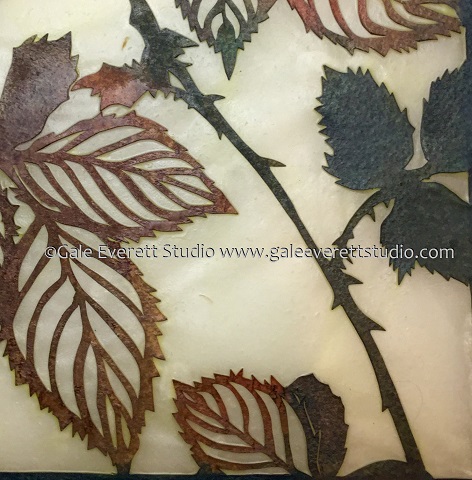
close up of the waxed blackberry piece
A friend asked me what will happen with this work after the ROT project? Right now, I can’t even think about it even being accepted to the show, where to display it if it’s not accepted, or who in their right mind would even want to purchase the work. That thought process will destroy my momentum forward. It will place too many doubts in the brain and slow things to a standstill. I just have to keep thinking this is a big experiment right now, keep the blinders on and continue to move forward. However, once enough works are created, then I can become unattached and send it out into the world.
Thursday evening I was happy enough to actually glue and set the tree rings to a piece of mulberry paper. It’s drying, slowly, under 20# of books and magazines (topped off with two chunks of thick metal). Maybe by Friday afternoon I’ll be able to contemplate mounting it to a frame and work on the next chapter of it’s life. Cell structure breakdown might be the next cutting project. I’ll figure it out by Sunday.
Yesterday I set about creating a different test piece, more elaborate and of a suitable size for sale. The cut work and coloring was accomplished that afternoon. Today, I mounted it to mulberry paper and a frame. It’s drying right now and I hope to apply wax before too long. Colorwise, I actually like how this piece is working. Yes, it’s miraculous I actually like a work in progress! I was thinking of the fall leaves turning colors while mixing little batches of acrylic ink (.5 tablespoons at a time!). Working with limited ink leads to a one of a kind piece. That’s what I’m heading for, individual works that can be cut almost the same but differ widely by the application of color. I’m sure I’ll be able to apply this to my existing lamp designs and create a completely different look. It’s good to dream….
While waiting for things to dry, I need to pull out Karen’s book and put pencil and ink to page. I’m still trying to figure out what it is I want to draw, but it will come. Maybe a little yard work under the big Douglas Fir trees will help inspire my brain. 🙂
Monday night there was a meeting for POST on the hottest evening of the year (97F or 36.1C). Fortunately, it wasn’t only about business, but involved a potluck dinner too! It’s always fun to gather with such a diverse group of artists! Not everyone could make it, but there were several new faces and some of friends not seen for quite a while. One in particular was Shannon Weber who I met only last year during a show at The Arts Center. That lead to my taking a one-on-one weekend workshop from her last spring and pushing me forward with more sculptural paper and wax combinations.
Seeing Shannon made me think about reconnecting with beeswax again. I’ve been struggling with glue/paper issues on all of my creations. Photomount spray glue is a massive pain in the ass and doesn’t seem to hold firm forever (I’ve been watching work at friends homes for the past couple of years). If you roll or brush on PVA glue over a thin papercut work, the glue always seeps around to the front edge and creates a glossy surface after drying (and buckles the paper below). Annoying and thoroughly frustrating after all that work. On Monday I had created and colored another black berry piece specifically to fit a black frame sitting on my desk. After the glue application, in which loads had seeped around to the front, I had about had it. That night I showed it to my husband and he proclaimed, “why not wax it?” Duh! Why not indeed?! That particular piece is too late to save and is pictured below. Maybe someone will still want it with the flaws.
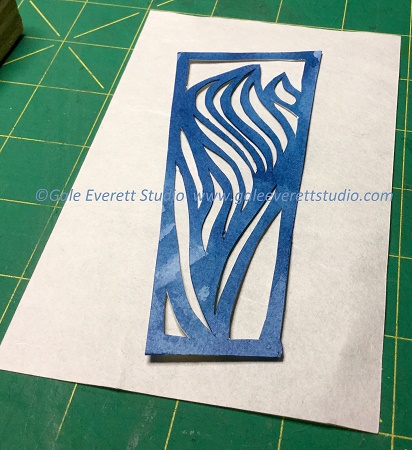
So here I am on Wednesday and decided to give it a good test. I used 140# coldpressed watercolor paper for the cut and colored it with acrylic ink.
Small test piece colored and ready to attach to mulberry paper.
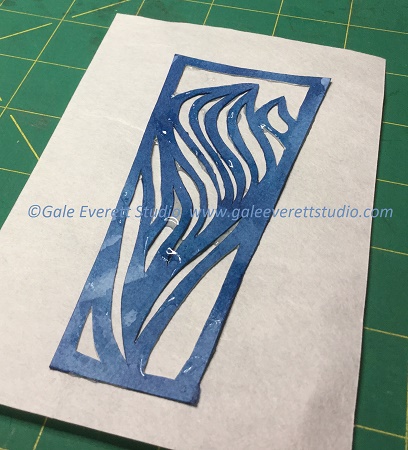
Next it was attached to the mulberry paper via a cellulose glue. I made sure to add plenty of glue to have it seep around to the front.
Glue down with plenty of seepage onto the front surface.
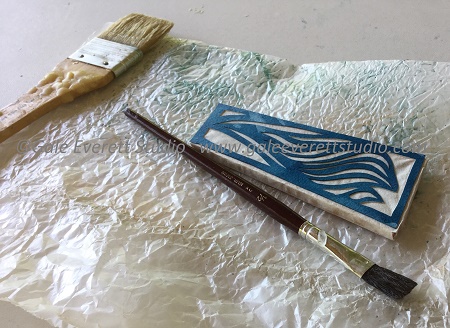
Once the initial glue dried, a balsa wood frame was attached and the mulberry paper glued to the surface.
Cut paper attached to balsa wood frame and dried. Ready for wax application.
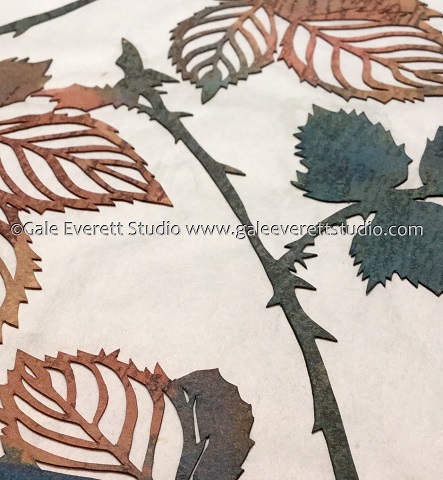
Wax was applied to all surfaces then heat saturated. Everything always shifts to golden yellows after applying beeswax. In the case of the blue, it gave it a green tinge.
Work after heat saturating the wax into the paper.
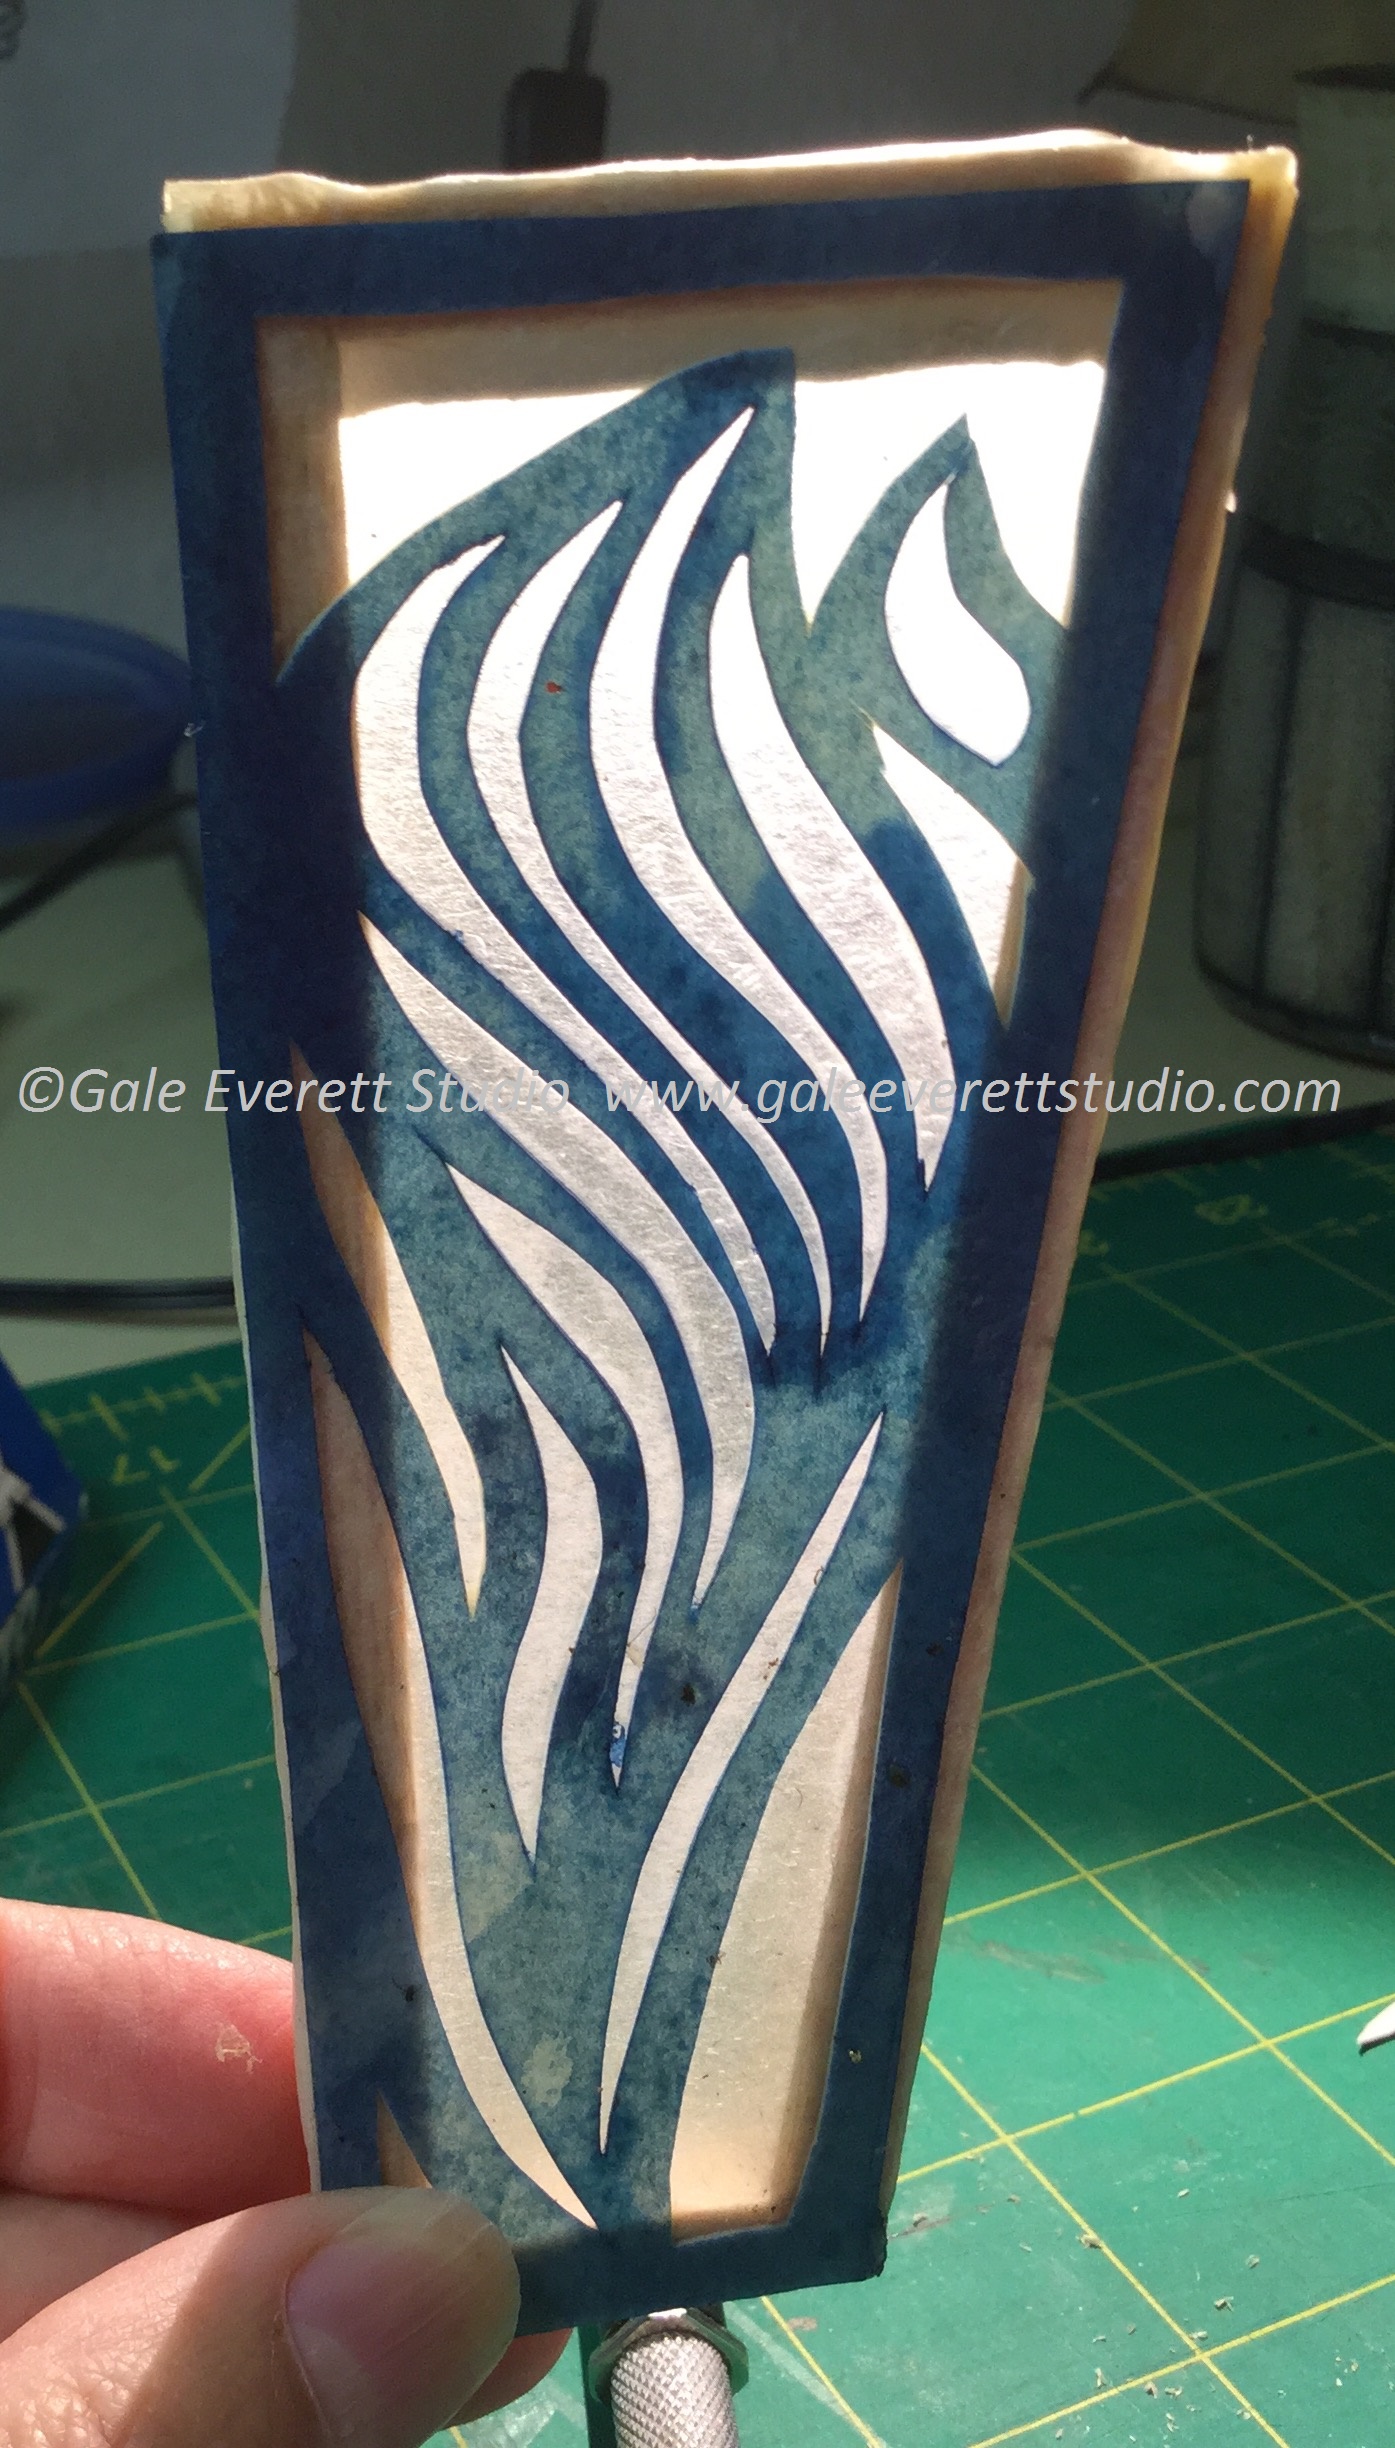
However, when light is placed behind, the yellow disappears and the paper becomes more translucent.
Shining a light behind the test work
So, I think I’ll create another larger work to test out this idea more thoroughly before tackling the tree rings. With the additional reminders of color shifts, I will probably darken the tree rings even more.
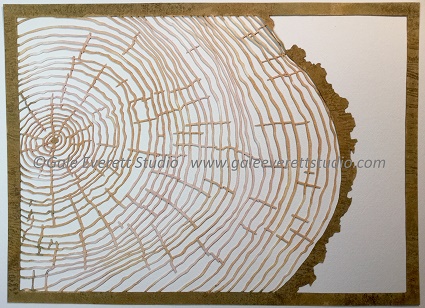
Second round of color on the tree ring piece.
More thoughts and tests to come. It’s also time to start working with the bench router I brought home a couple of weeks back. It should enable more control and smoother cuts on the fir or hemlock to frame the works.
Tree Rings and Bark, hand-cut paper, Gale Everett Studio 2015
When is anything done? That’s a question all artists have to work through with each project they tackle. I’m currently debating that question with the above piece. Is ready for mounting or not? The color is alright, but is it dark enough? Do I even need to consider making it darker since it’s more about the light shining through from behind? Decisions, decisions, decisions… I’ll let it dry and continue contemplation for a while longer.
Size: 13″ x 9.5″ (33cm x 24cm) hand cut Arches watercolor paper, acrylic ink washes
 Slowly the front page of Karen’s book is coming together. It’s been another crazy couple of days and I’m just sitting down for a little sketch time. So far I’ve laid out the salamander body. Why a salamander? I have no idea, but it just seemed like a fun forest critter to add. It did become rather large, but I can’t go backwards now. This is a long toed variety. They have a lovely green pattern that runs from between the eyes to the tip of the tail. The body color is dark, shiny, with flecks of the same spotting on it’s sides. I really love the patterns down their back. It also surprises me at how their body gets creases and folds as they walk. These little guys live underground throughout our valley and into the mountains.